> ## Documentation Index
> Fetch the complete documentation index at: https://docs.occtoo.com/llms.txt
> Use this file to discover all available pages before exploring further.
# Create a segment
> Build a segment in four steps: details, segment type, entry selection, and save.
A segment is a saved selection of entries from one card. You can use a segment in an endpoint to either include or exclude those entries.
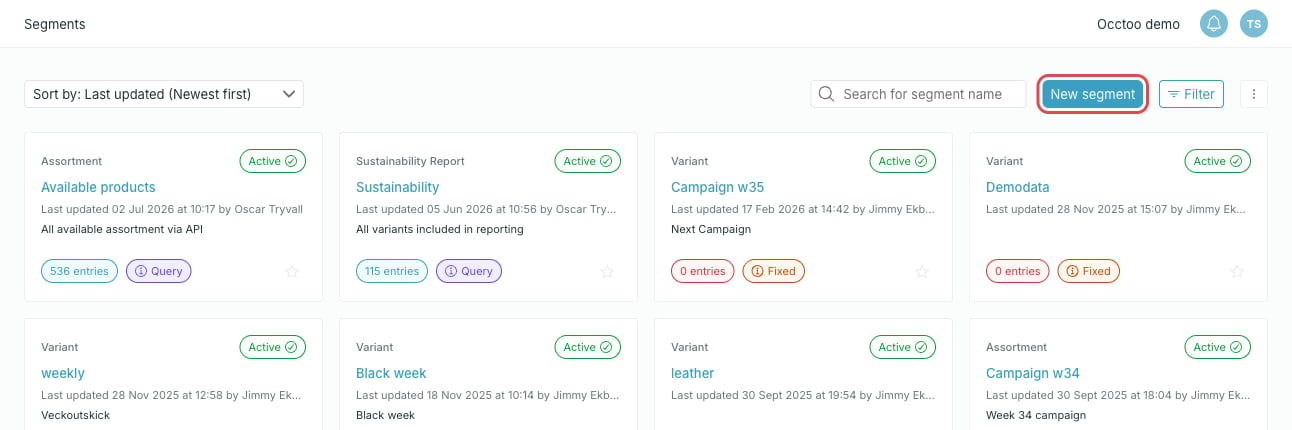
To start, press **New segment** in the upper right corner of the **Segments** page.
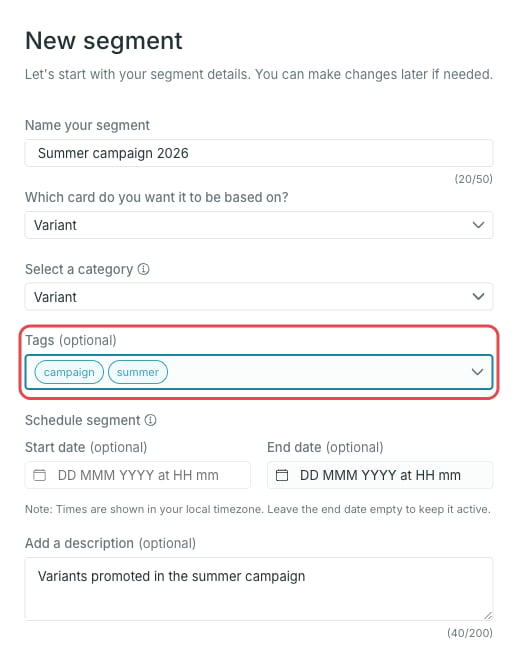
 * **Name your segment** — required, and unique within the selected category.
* **Which card do you want it to be based on?** — required. The segment can only contain entries from this card.
* **Select a category** — required. Categories group similar segments together. See [Create a segment category](/guides/studio/segments/create-a-segment-category).
* **Tags** — optional. Free-text labels on the segment, described below.
* **Schedule segment** — optional start and end date. See [Schedule a segment](/guides/studio/segments/schedule-a-segment).
* **Add a description** — optional.
* **Name your segment** — required, and unique within the selected category.
* **Which card do you want it to be based on?** — required. The segment can only contain entries from this card.
* **Select a category** — required. Categories group similar segments together. See [Create a segment category](/guides/studio/segments/create-a-segment-category).
* **Tags** — optional. Free-text labels on the segment, described below.
* **Schedule segment** — optional start and end date. See [Schedule a segment](/guides/studio/segments/schedule-a-segment).
* **Add a description** — optional.
 The card list only contains active cards. Selecting a different card resets the category and any filters you already picked.
Open **Tags** to pick from the tags already used in the tenant, or type a new one and press **Create "…"** to add it. A segment can carry several tags, and they can be changed later from the segment page.
Tags travel with the segment as metadata: a destination can fetch the tags of the segments it serves, so the receiving side can act on them without hard-coding segment names.
Press **Next**.
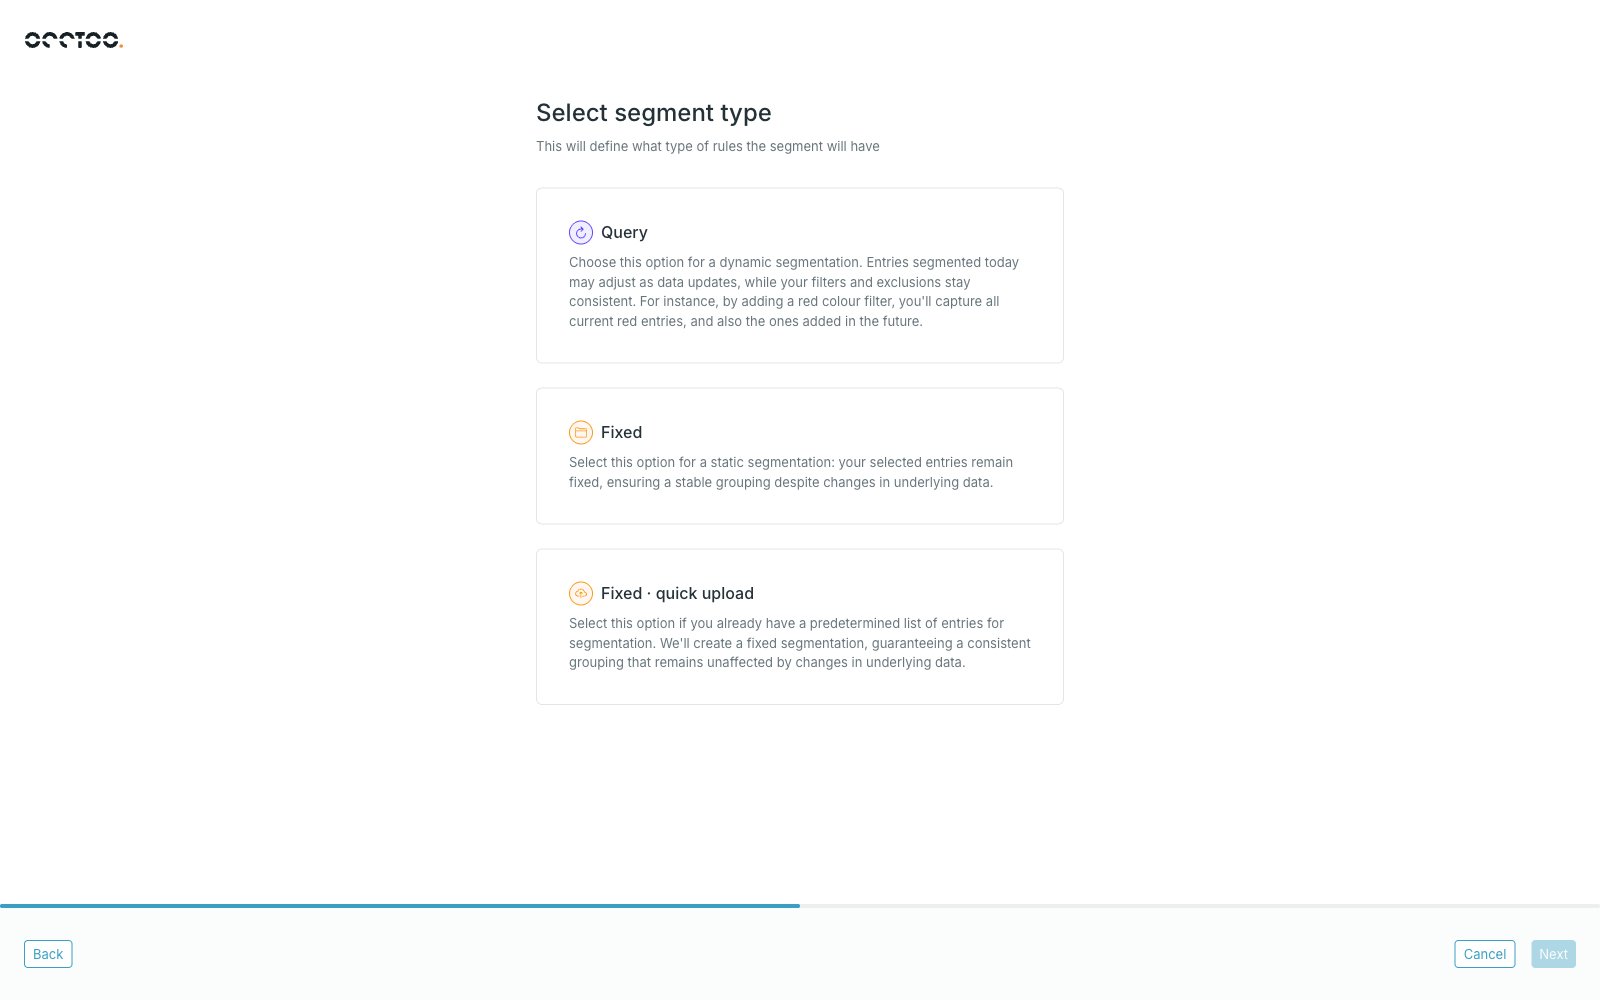
The segment type decides how the entry selection behaves over time.
* **Query** — dynamic segmentation. Entries are re-evaluated as data changes, while your filters and exclusions stay the same. A red colour filter, for example, keeps capturing red entries that are added later.
* **Fixed** — static segmentation. The entries you pick stay in the segment even when the underlying data changes.
* **Fixed · quick upload** — static segmentation built from a CSV list of entry IDs. See [Upload a fixed segment](/guides/studio/segments/upload-a-fixed-segment).
The card list only contains active cards. Selecting a different card resets the category and any filters you already picked.
Open **Tags** to pick from the tags already used in the tenant, or type a new one and press **Create "…"** to add it. A segment can carry several tags, and they can be changed later from the segment page.
Tags travel with the segment as metadata: a destination can fetch the tags of the segments it serves, so the receiving side can act on them without hard-coding segment names.
Press **Next**.
The segment type decides how the entry selection behaves over time.
* **Query** — dynamic segmentation. Entries are re-evaluated as data changes, while your filters and exclusions stay the same. A red colour filter, for example, keeps capturing red entries that are added later.
* **Fixed** — static segmentation. The entries you pick stay in the segment even when the underlying data changes.
* **Fixed · quick upload** — static segmentation built from a CSV list of entry IDs. See [Upload a fixed segment](/guides/studio/segments/upload-a-fixed-segment).
 Press **Next**.
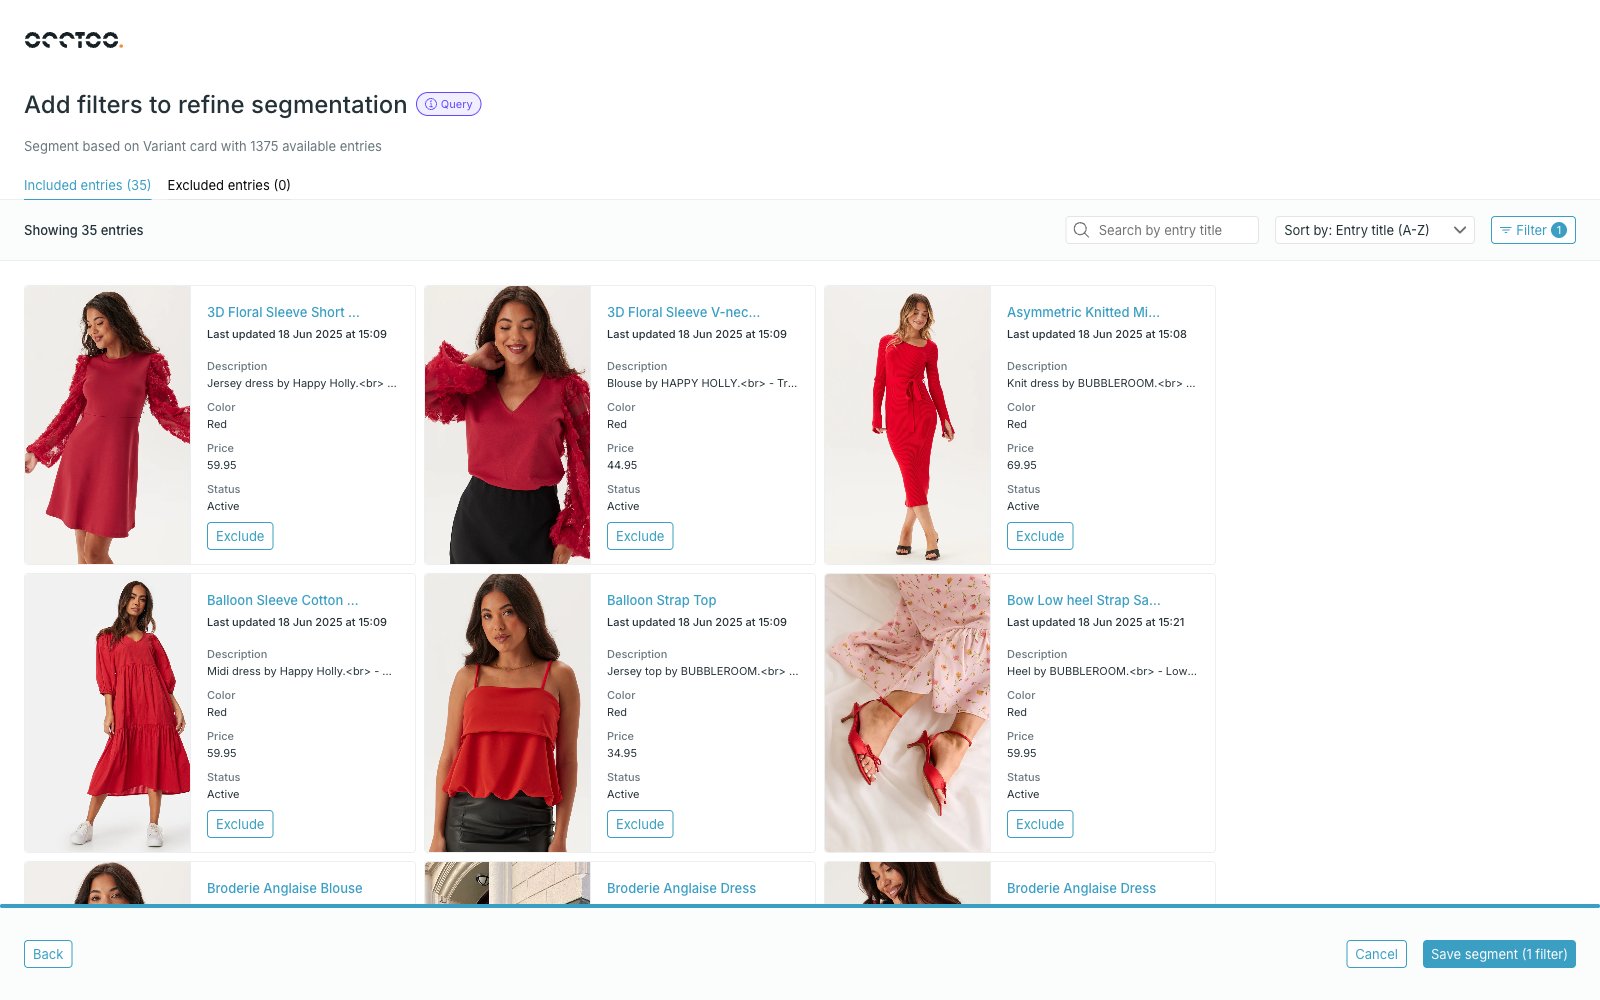
The selection view lists every entry on the card. Use **Filter** to narrow it down, **Search by entry title** to look for a single entry, and **Sort by** to change the order.
Press **Next**.
The selection view lists every entry on the card. Use **Filter** to narrow it down, **Search by entry title** to look for a single entry, and **Sort by** to change the order.
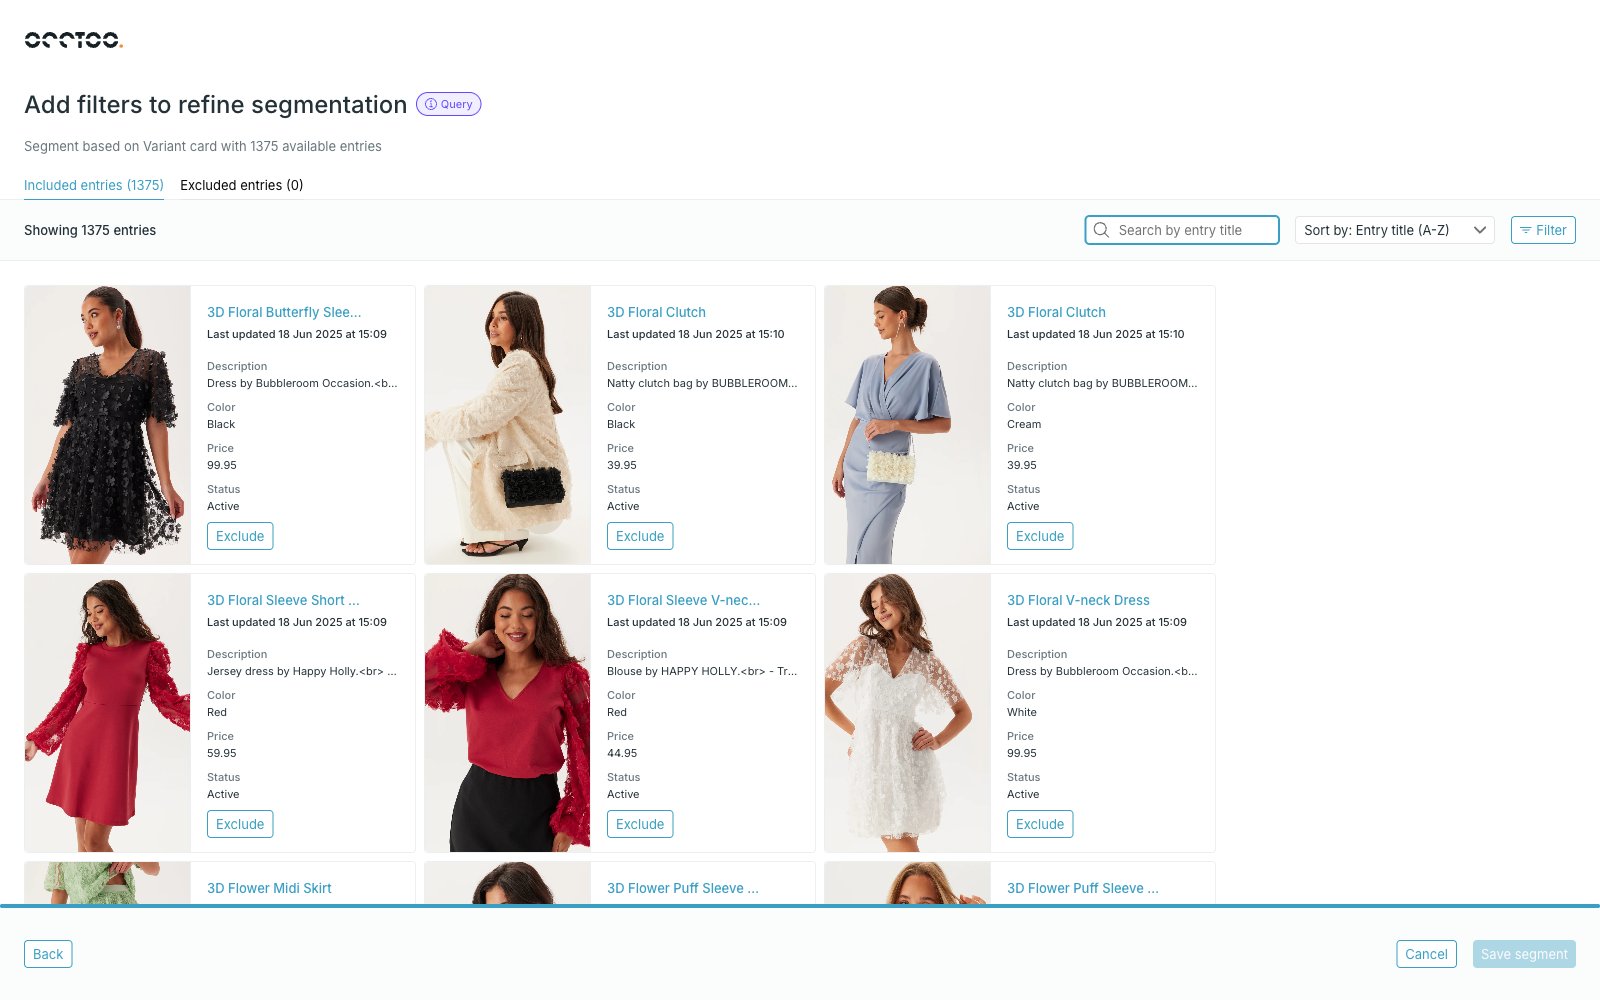 The header shows how many entries the card holds. The tabs and the controls on each entry differ per segment type.
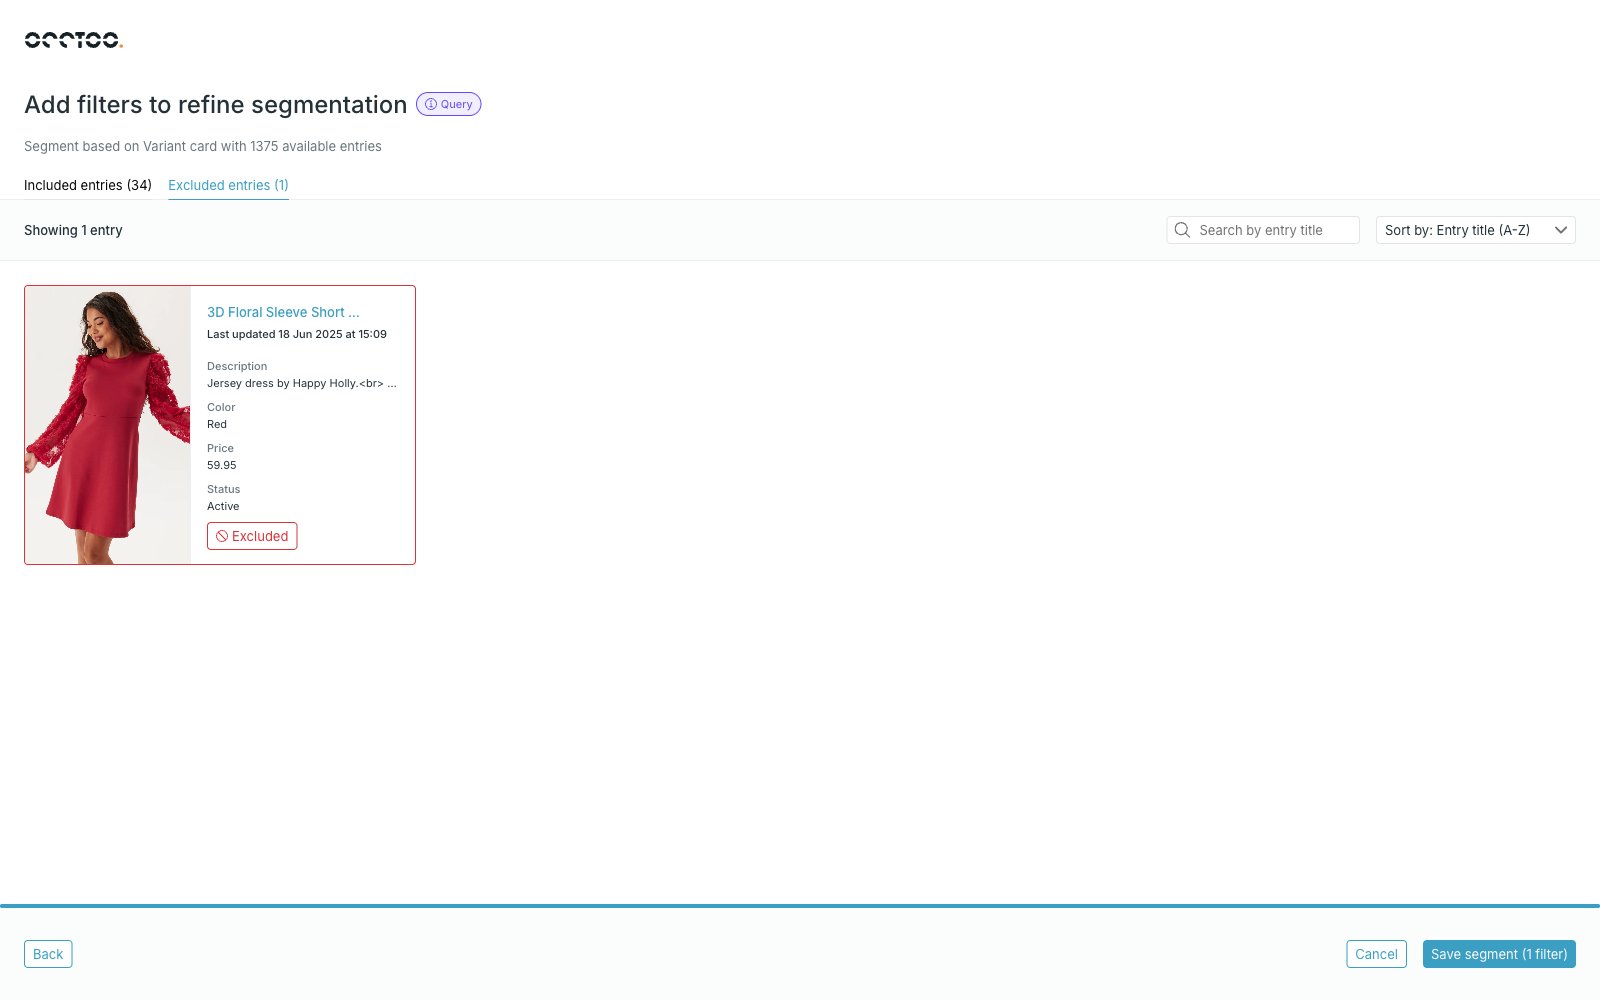
**Query** — the tabs are **Included entries** and **Excluded entries**. Apply filters and let the result set define the segment, then press **Exclude** on any entry you want to keep out of it.
The header shows how many entries the card holds. The tabs and the controls on each entry differ per segment type.
**Query** — the tabs are **Included entries** and **Excluded entries**. Apply filters and let the result set define the segment, then press **Exclude** on any entry you want to keep out of it.
 Excluded entries move to the **Excluded entries** tab, where you can include them again.
 **Fixed** — the tabs are **All entries** and **Included entries**, and every entry carries a checkbox. Use the filters and search to find entries, tick the ones you want, and review the result under **Included entries**. **Clear** empties the selection.
Filtering has its own page with every filter type and operator: [Filter segment entries](/guides/studio/segments/filter-segment-entries).
Press **Save segment** in the lower right corner. The button also shows how many filters the segment is saved with.
After saving, Studio asks whether the segment should be included in a destination. Choose **Yes, include in Destinations** to pick destinations right away, or **No, I'll do it later** to open the segment page.
A new segment starts in **Initializing** status and becomes **Active** once the entries are processed. Allow a few minutes for large segments.
## Leaving the flow
**Cancel** discards the segment, and **Back** returns to the previous step. Both ask for confirmation first, because going back clears the current selections and filters.
**Fixed** — the tabs are **All entries** and **Included entries**, and every entry carries a checkbox. Use the filters and search to find entries, tick the ones you want, and review the result under **Included entries**. **Clear** empties the selection.
Filtering has its own page with every filter type and operator: [Filter segment entries](/guides/studio/segments/filter-segment-entries).
Press **Save segment** in the lower right corner. The button also shows how many filters the segment is saved with.
After saving, Studio asks whether the segment should be included in a destination. Choose **Yes, include in Destinations** to pick destinations right away, or **No, I'll do it later** to open the segment page.
A new segment starts in **Initializing** status and becomes **Active** once the entries are processed. Allow a few minutes for large segments.
## Leaving the flow
**Cancel** discards the segment, and **Back** returns to the previous step. Both ask for confirmation first, because going back clears the current selections and filters.