1
Fill in the card details
- Name your card — required, and unique across cards. A clash is reported when you press Next.
- Add a description — optional.
- Choose data source — required. You can pick several.
-
Allow properties enrichment — Yes or No. This sets the default for every property selected in this flow. No is preselected.
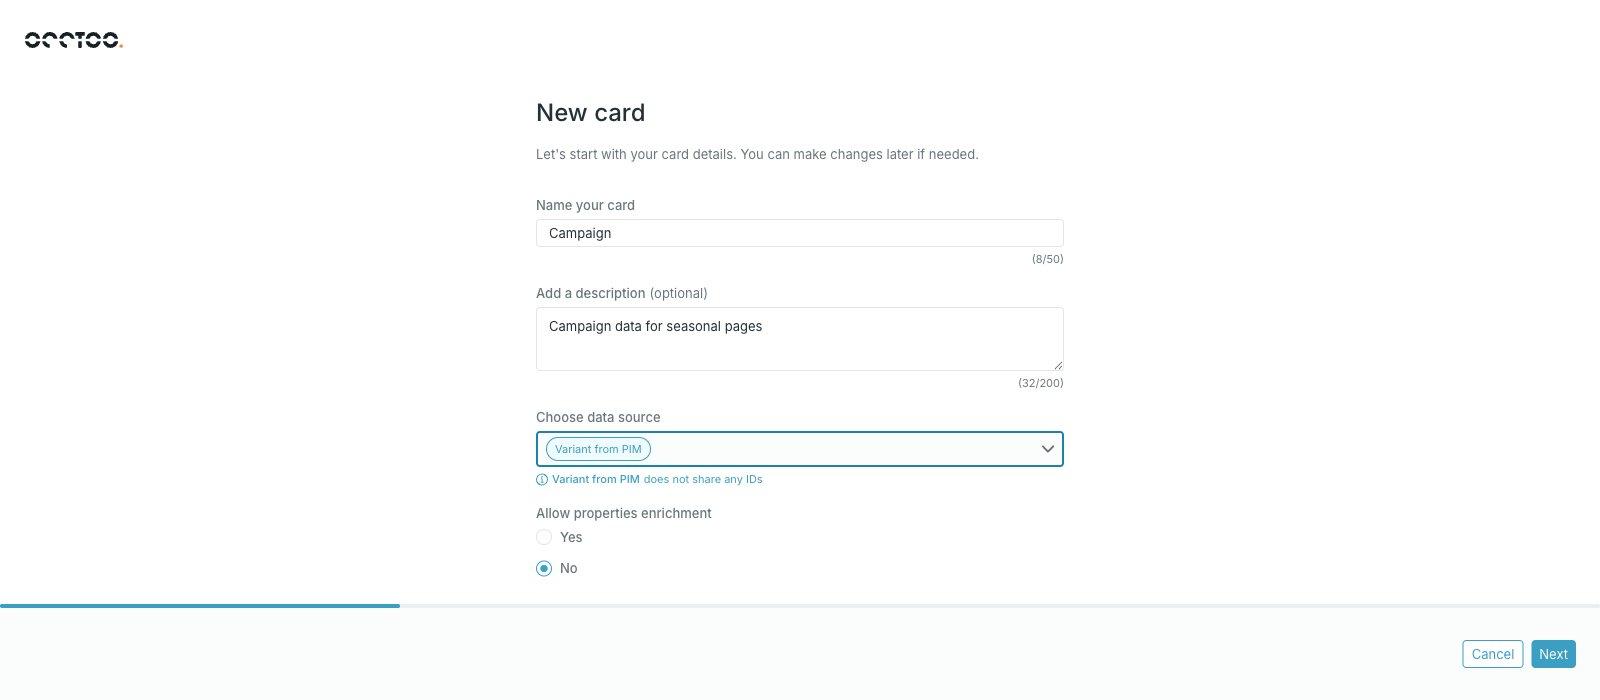
After the first source is picked, the list narrows to sources that share IDs with it, and a note under the field reads either “source shares ID with other sources” or “source does not share any IDs”. Sources that share no IDs cannot be combined on one card. You define which sources share IDs on the source itself.
2
Select the properties to include
The table lists every property in the selected sources, with Source property ID, Source and Data origin (Source based or User created). Tick the properties the card should hold.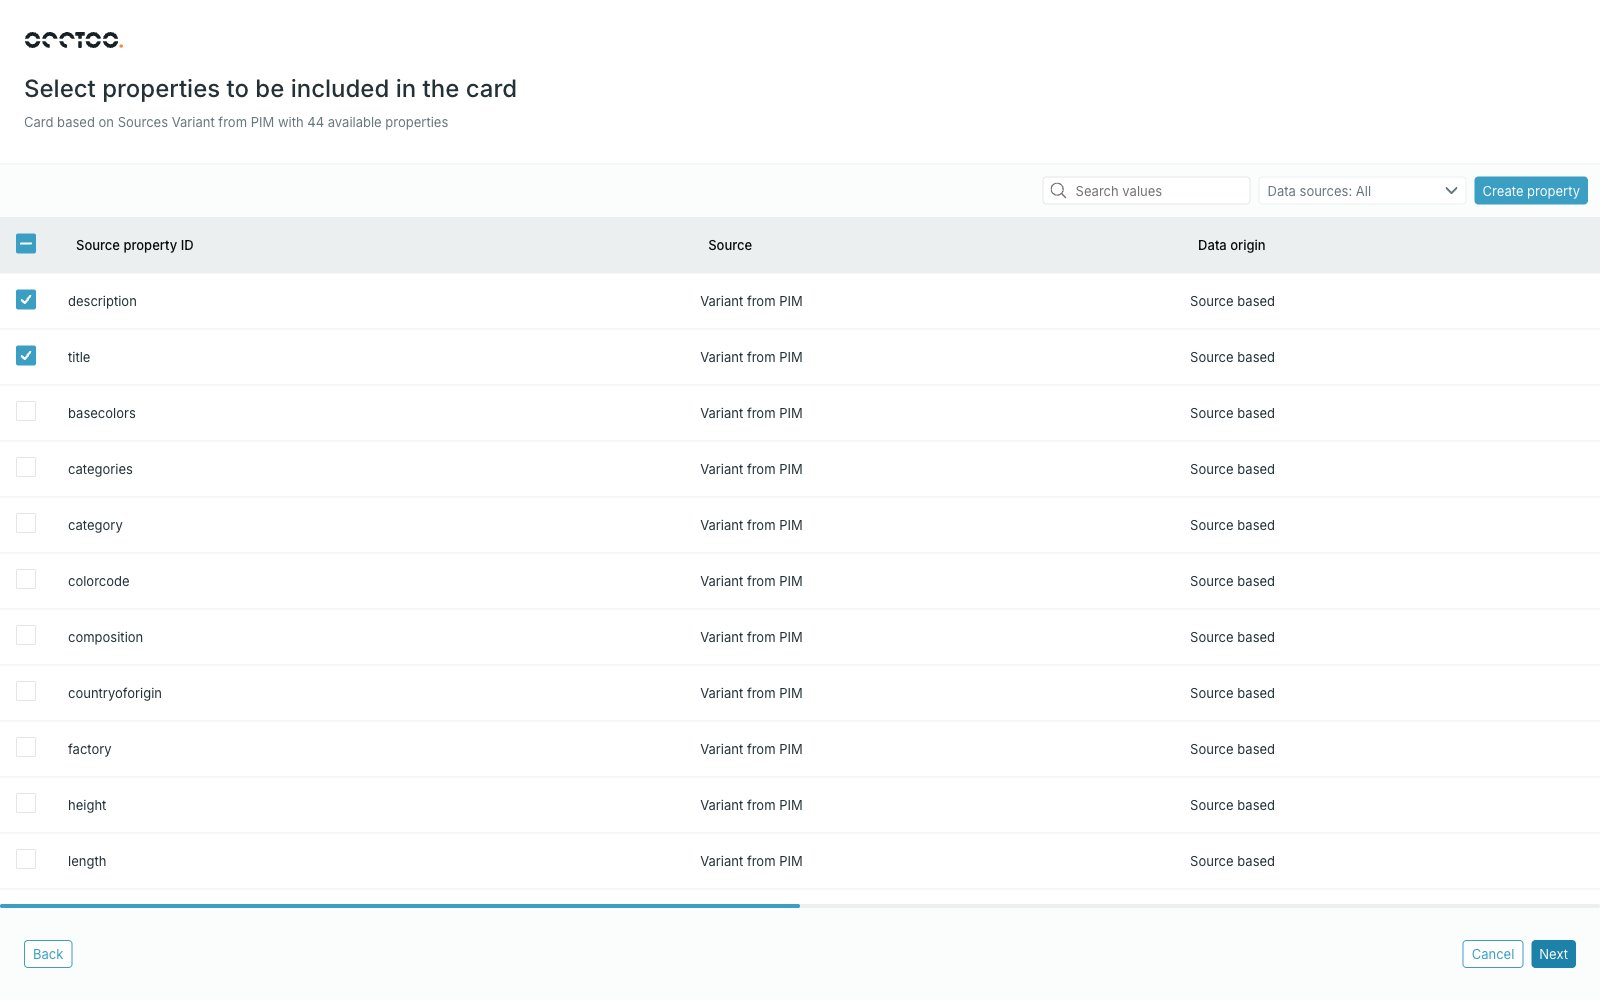
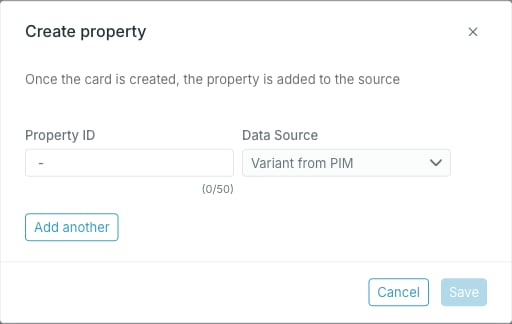
With nothing selected, the button reads Save card without properties and creates an empty card. It changes to Next as soon as you tick a property.
3
Fill in the property details
Set how each selected property behaves on the card. Identifier is prefilled from the source’s suggestion.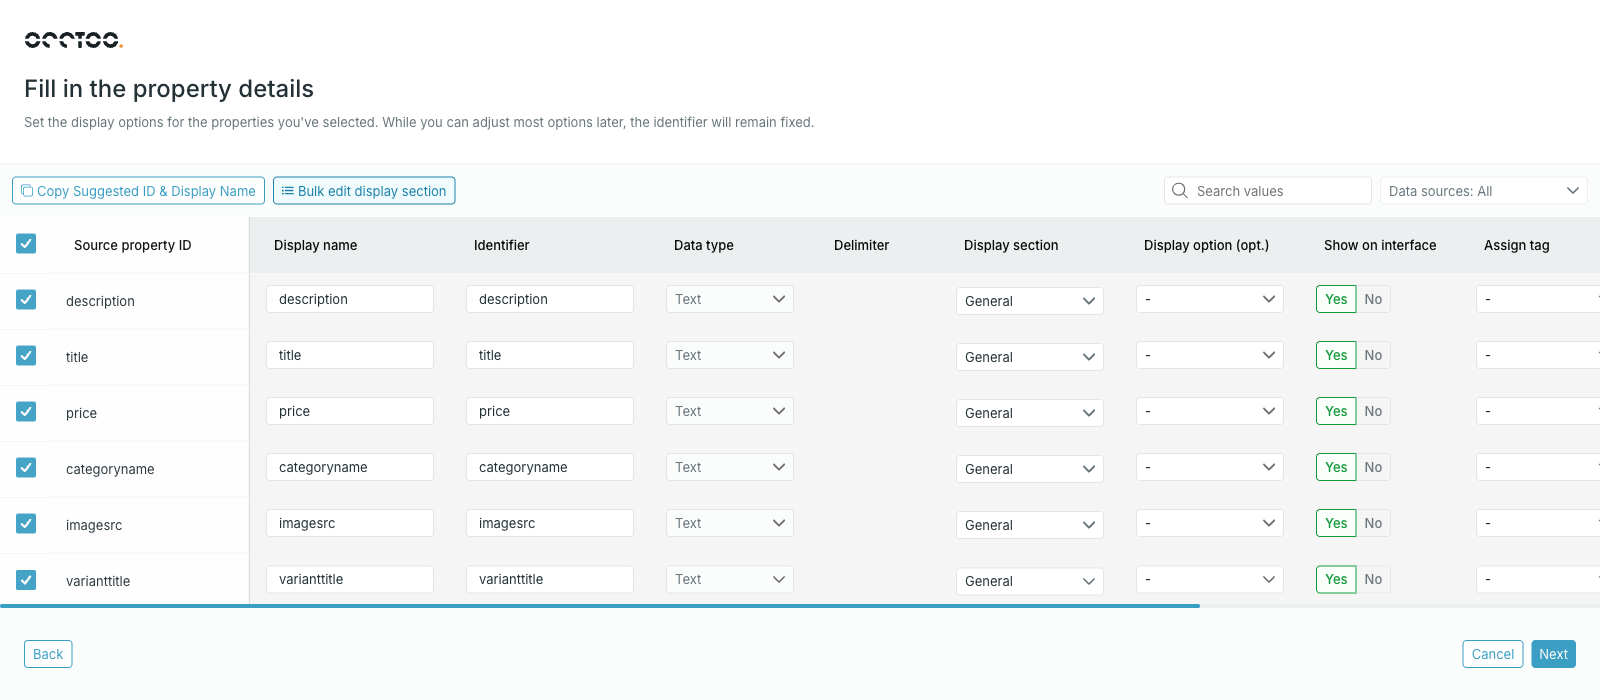
- Display name — required, the name shown in Studio.
- Identifier — the name destinations use for this property.
- Data type and Delimiter — inherited from the source property. See Add a property for when these can be changed.
- Display section — which section the property sits in on the entry interface.
- Display option (opt.) — see Display sections and display options.
- Show on interface — whether the property is visible on entries.
- Assign tag and Key based tag — connect the property to a managed tag list.
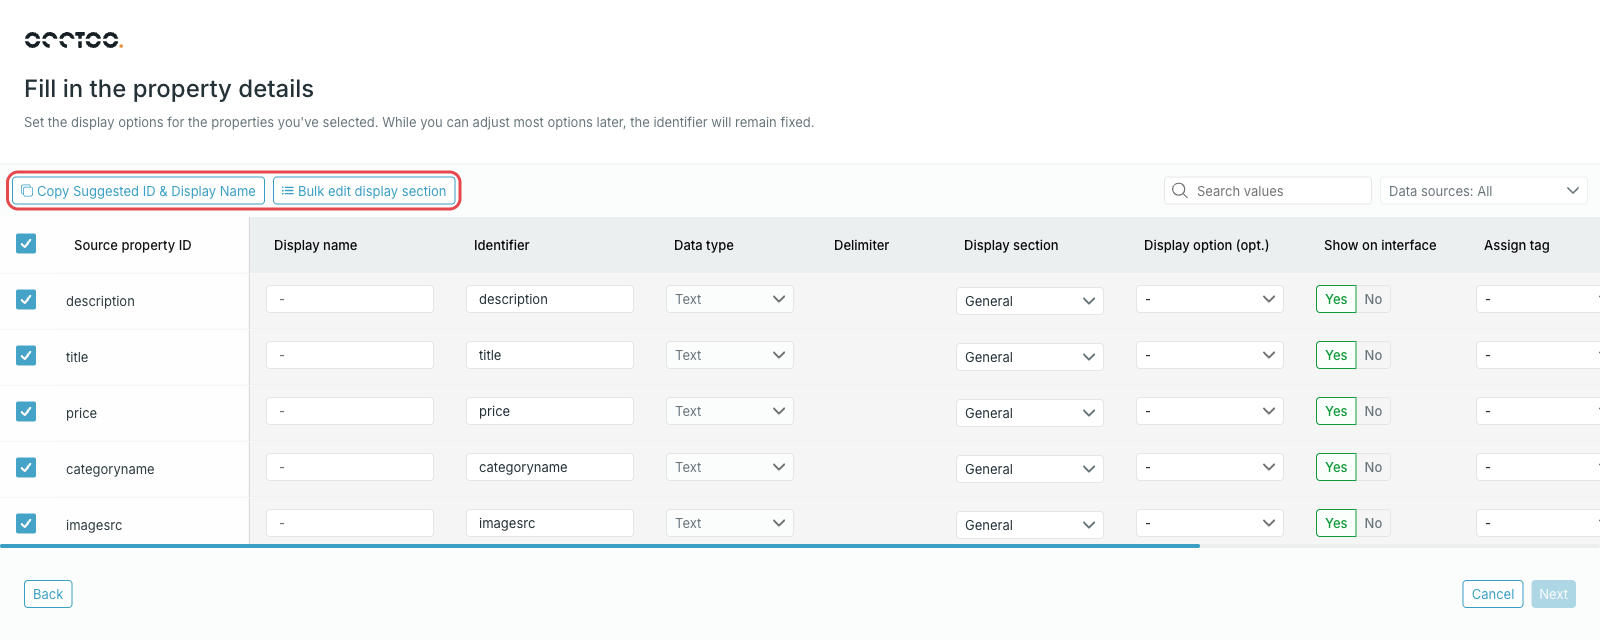
- Copy Suggested ID & Display Name — fills identifier and display name for the selected rows from the source property.
-
Bulk edit display section — moves the selected rows into one section.
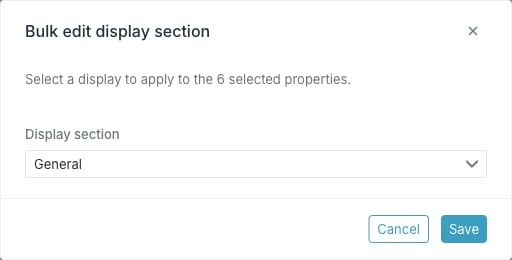
The Allow enrichment column only appears when you answered Yes to Allow properties enrichment in the first step.
4
Reorganize the display sections
Drag sections and the properties inside them into the order you want. Add new section creates another section; the handles on each section row remove, rename and reorder it.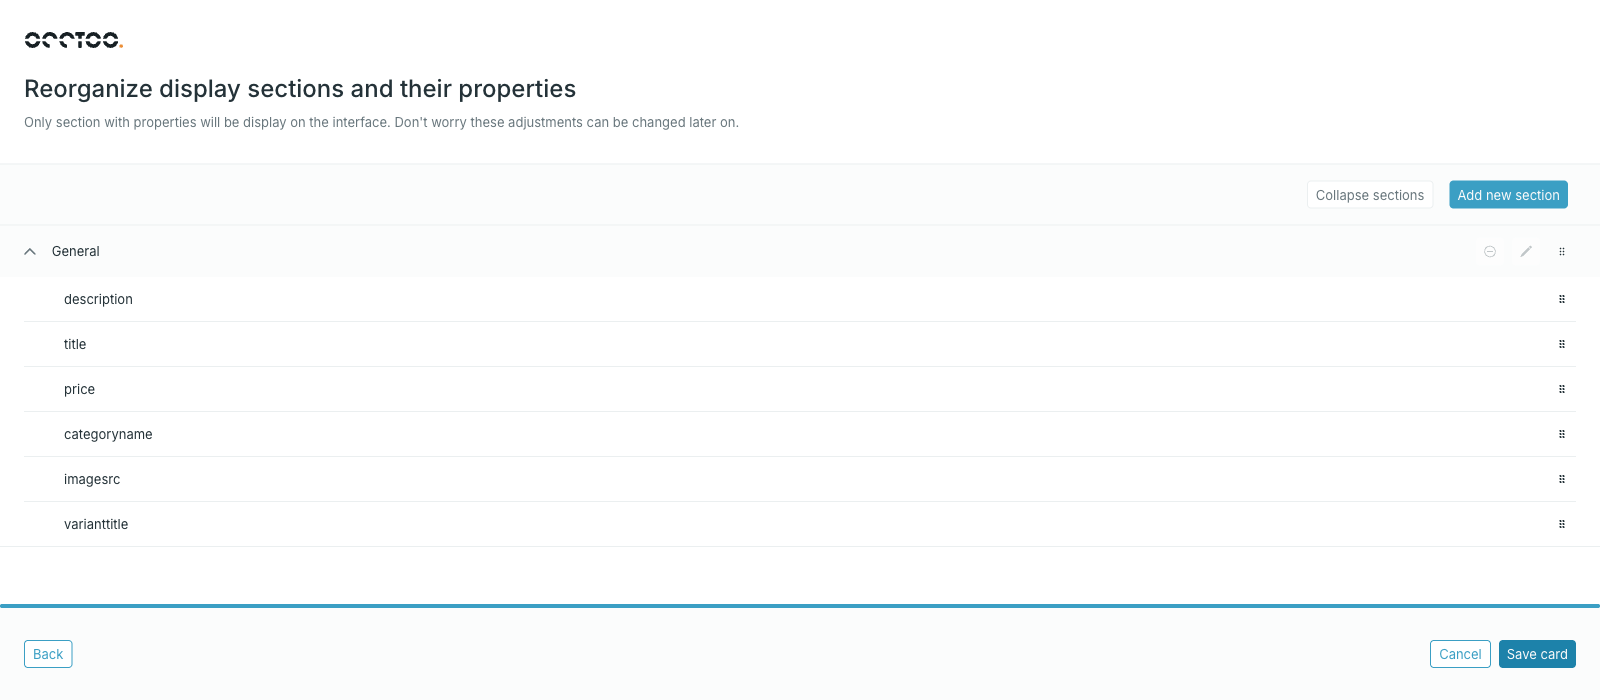
Only sections that hold properties are shown on the interface, and all of this can be changed later from the card page.
Activate the card
A new card stays in Draft until you activate it. Open the card and press Activate card. Only then can it be used in segments and destinations.