

1
Open the dialog
On the destinations listing, click New destination.
2
Choose a destination type
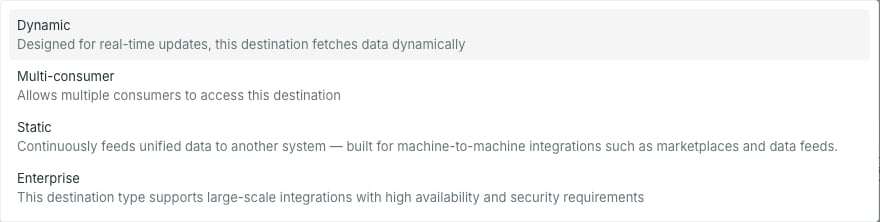
3
Name it
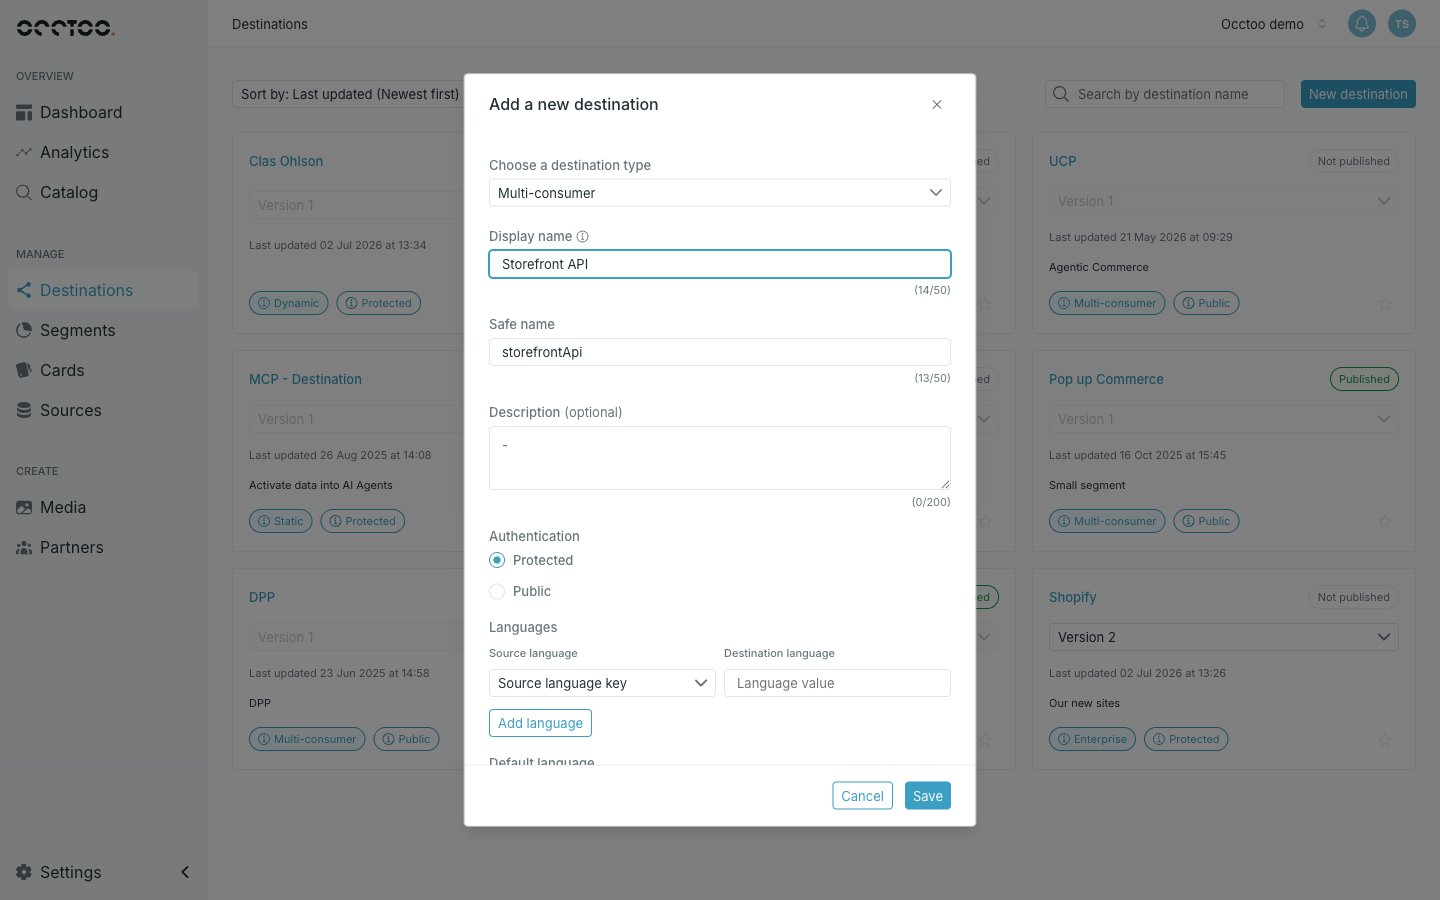
- Display name — what you and your colleagues see in Studio.
- Safe name — the URL segment. Studio derives it from the display name as you type, converting it to camelCase and dropping anything that is not alphanumeric, but you can overwrite it.
- Description — optional.
4
Choose the authentication
Protected requires a token from a registered application; Public serves anyone with the URL.
This choice only appears for the Multi-consumer type. Every other type is Protected.
5
Add the languages
Each row maps a Source language — a language key that already exists in your onboarded data — to the Destination language code you want to expose on the API. Use Add language for another row, and pick which of them is the Default language.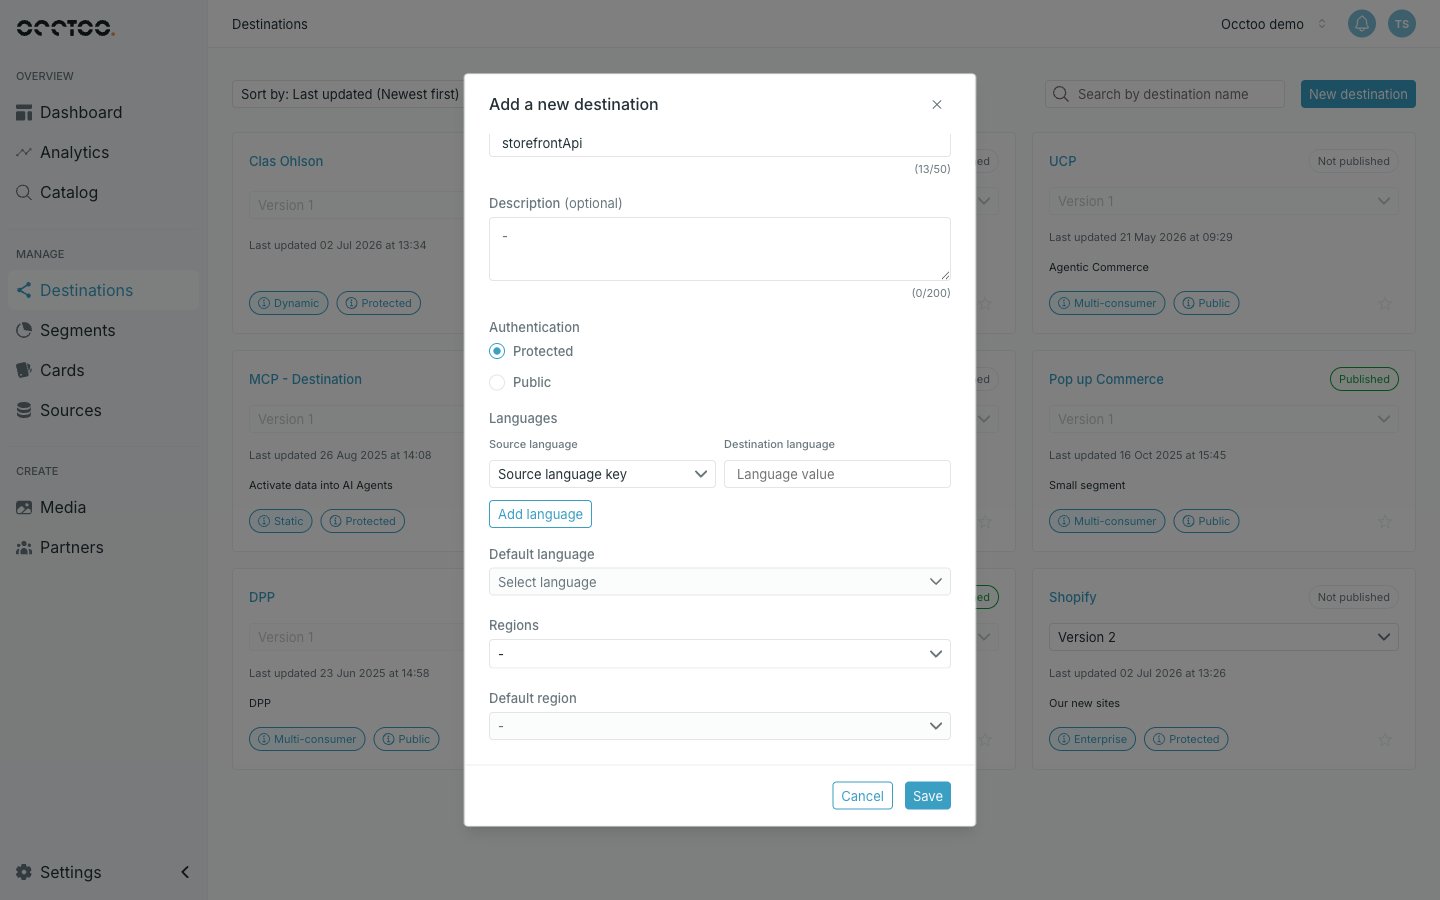
_ and -, and must each be unique within the destination. Add every language you intend to query on — localized fields cannot be requested for a language the destination does not carry. See Languages.6
Choose the regions
Regions are where the API is hosted, and Default region is the one used when a caller does not specify. Only the regions your contract covers are listed; if there is a single option it is chosen for you.
7
Save
Click Save. Studio opens the new destination on Version 1, in the Not published state.